Cara Instalasi Digisign Play
Download Digisign Play untuk Android dari link ini
 .
.
Masuk ke Setting, Advance, Special app access, aktifkan "Install Unknown apps" atau "Install apps from unknown sources" lalu jalankan file digisignplay.apk yang sudah didownload.
The digisignPlay Android Player released as an APK file which can be opened and installed by the Android OS.
There are 4 steps to follow:
- Preparation - Minimum Requirements and APK
- Installation - Click APK to start the installation process.
- Connect - Connect your Player to the CMS.
- Authorise - Authorise your Display with the CMS.
Preparation - Minimum Requirements
digisignPlay does not require many resources to run, however with the advance of technology it has been necessary to set out some minimum requirements. The installation process will check these for you, but they are listed below for convenience:
- A network connection to the CMS (possibly over the Internet)
- Android 4.4
- Please note: As a minimum, Android 4.4 is required to run digisignPlay for Android 1.7, 1.8 and 3.0, but we strongly recommend running on Android 7.1 or later regardless of version.
- SDK 19 minimum
- SDK 25 is recommended
- Support Video Encoder
We recommend Android 7.1 or above.
Installation
- Download digisignPlay for Android and click on the digisignPlay.apk file.
- Waiting for install progress.
- Done.
Please note: You may see a security warning or a message asking if you allow an app from an unknown sources to make changes, during the installation stage. Please accept by clicking on “Run” or “Yes” to continue with the installation.
Connect to your CMS
- Manual Configuration (CMS Address and Key)
Manual Configuration
Complete the required fields in the Player Options window, from the Connect tab:
- CMS Address: This is the fully qualified address of your CMS installation. For example http://apps.digisignplay.com
- CMS Key: The secret CMS Key that will authenticate this Display with the CMS.
- Connect.
- You'll be redirect to Licence Code. You'll have Licence Code after buy subscription plan.
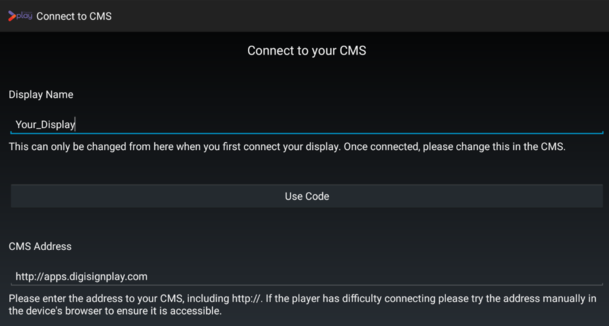
Ask your Administration for the Key.


Didn't receive Licence Code after buy plan? Ask your Administrator for registering display.
Your Administrator will register your display and connect to your personal account.
Launch digisignPlay Player
Enjoy with digisignPlay running on Android Display!
Download dengan klik  lalu klik kanan dan pilih Install.
The digisignPlay Windows Player is distributed as a windows installer file (MSI) which is a standard “double click” installation.
There are 4 steps to follow:
- Preparation - Minimum Requirements and MSI
- Installation - Double-click the MSI to start the installation process.
- Connect - Connect your Player to the CMS.
- Authorise - Authorise your Display with the CMS.
Preparation - Minimum Requirements
digisignPlay does not require many resources to run, however with the advance of technology it has been necessary to set out some minimum requirements. The installation process will check these for you, but they are listed below for convenience:
- A network connection to the CMS (possibly over the Internet)
- Microsoft Windows 10 or later (see note below)
- Please note that starting with Windows 10 it is advisable to use the “professional” variant of the operating system. The “home” version no longer has the ability to fully control the schedule of automatic updates which may cause messages to interrupt your signage playback.
- .NET Framework v4.7.3
- Visual C++ Redistributable for Visual Studio 2015-2019 x86 (will be downloaded if not present)
- Internet Explorer 8+ ( recommended IE11 or higher )
- Flash Player Version 9 or later (if Flash support required)
- Windows Media Player 11 or later
- For PowerPoint support; Microsoft PowerPoint 2003 or later. PowerPoint viewer is not suitable.
- For edge browser tags and HLS support the Webview2 runtime is required. Download here
We recommend Windows 10 build 1909 or later. Enterprise LTSB is known to have issues with video playback.
Installation
- Download digisignPlay for Windows and double click on the digisignPlay.msi file.
- The installer presents a Welcome screen, click Next:
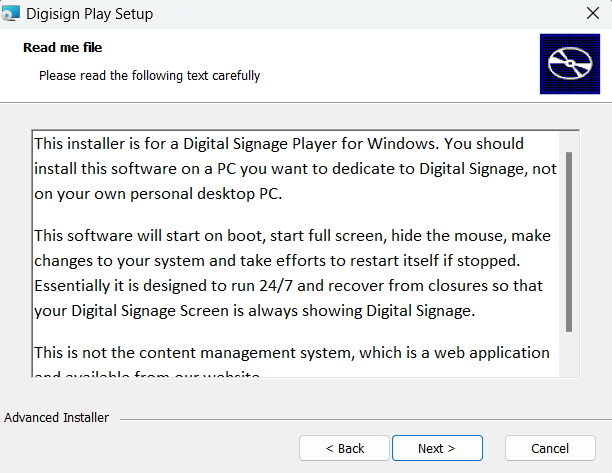
- Read the Read me file and click Next:
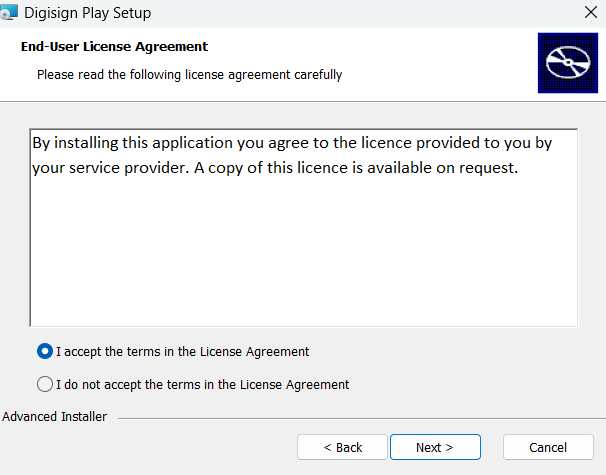
- Read the End-User License Agreement and click to accept these terms, click Next
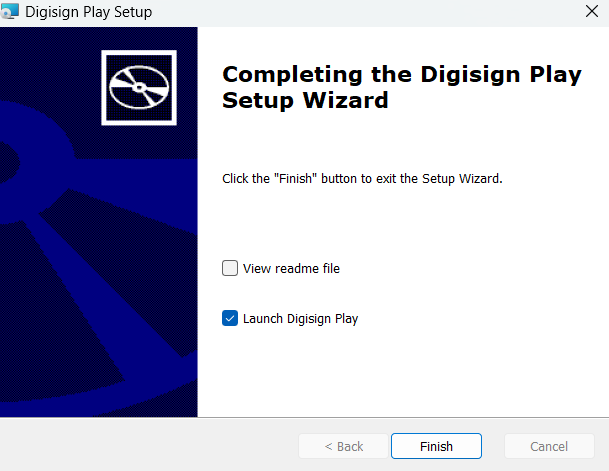
- The Installation is now complete, click Finish to exit the Setup Wizard:
The installer will take you through a number of screens, which are outlined below.
Please note: You may see a security warning or a message asking if you allow an app from an unknown publisher to make changes, during the installation stage. Please accept by clicking on “Run” or “Yes” to continue with the installation.

Click Install or click Back to review:
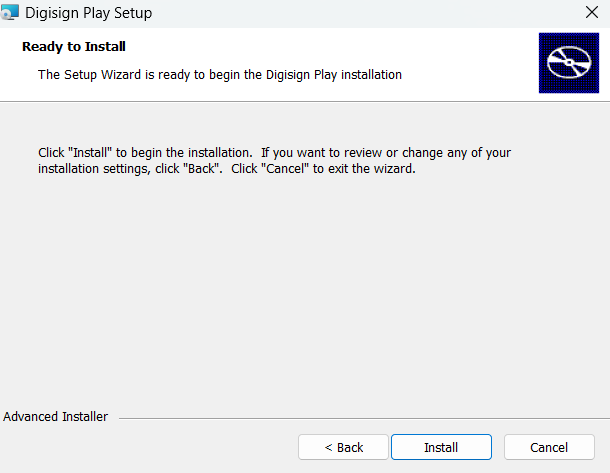
The Setup Wizard will start to install the digisignPlay Player, which may take several minutes.
Connect to your CMS
Newly installed Players must be configured and registered with the digisignPlay CMS before they can be used using Player Options.
The Player Options window is accessed from the Player using the Start Menu and selecting All programs.
Most of the Player options are set on the CMS and delivered over the network to the Player. This keeps the Player configuration to a minimum on each new installation.
Before any options can be sent from the CMS it is necessary to register the Display with the CMS instance by either:
- Manual Configuration (CMS Address and Key)
Manual Configuration
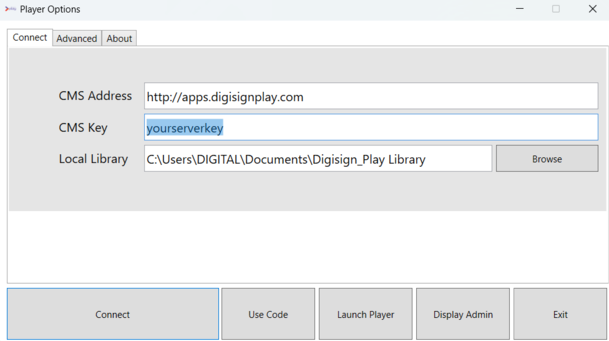
Complete the required fields in the Player Options window, from the Connect tab:
- CMS Address: This is the fully qualified address of your CMS installation. For example http://apps.digisignplay.com
- CMS Key: The secret CMS Key that will authenticate this Display with the CMS.
- Connect and wait your Administrator to approve your Display.
- Launch Player.
Ask your Administrator for the Key.
Your Administrator will register your display and connect to your personal account.
Display Setting Profiles
Once registered, the Player will be given a default Display Setting Profile.
Launch digisignPlay Player
You can now select "Launch Player" from the Player Options window or go to all programs and click on digisignPlay Player. It should display the digisignPlay Splash Screen while the Default Layout and its media contents (and anything else you have Scheduled) are downloaded.
The Player will then begin playing Layout contents.
REQUIREMENT SAMSUNG TYPE. Note: All listed monitors with a ✓ symbol have been officially tested. Any models without this symbol are expected to work as they contain the same chipset as the listed models.
SSSP5
- 43/49 DBJ
- 49/55/65 QMH ✓
- 55/65 QHH
- 65/75 QBH
SSSP6
- 13/24/43/49/50/55/65/75/85/98 QBR ✓
- 32/43/49/50/55/65/75/85 QMR ✓
- 37 SHR - Please note that this model supports landscape orientation only.
- 43/49/55/65/75 QBN ✓
- 43/49/50/55/65/75 QHR ✓
- 43/49/55/65/75/85/98 QMN ✓
- 46 VMR-U
- 46/55 OMN/OMN-D ✓
- 55 OHA
- 82 QEN
- 85 OHN/OHN-D/OHN-S
- 98 QBT
- 98 QMT
Signage Player Box
- SBB- SS08NL1
- 13/24 QBR-T
- 55/65 QHH
- 65/75 QBH
INTERACTIVE DISPLAY: Please note that interactive actions are supported in digisignPlay for Tizen version 300 and newer.
SSSP5
- 43/49 DBJ
- 49/55/65 QMH ✓
- 32/43/55 QMR-T
SSSP7
- 55 OHA-S
- 75 OMR
- 75 OMA ✓
- 82 QER ✓
- 82/98 QPR ✓
- 46 OHB
- 46/55 OMB
- 55 OMN-S
SSSP10 - Newest Version
- 43/50/55/65/75 QBB
- 43/50/55/65/75 QHB
- 43/50/55/65/75 QMB ✓
- 24/46 OHB
Prepare Your Monitor
It is essential that the correct Time and Date + Timezone are set on your monitor prior to player installation!
- Use the Menu button on your remote control to access the System Menu.
- Select Time
- You can choose to manually set the time using the Clock Set option or you can go to NTP Settings to configure an NTP Server for automatic time settings. Please note that you will find the time zone settings in the NTP Settings menu.
- Turn on NTP Time
- Input http://apps.digisignplay.com and set time to Bangkok, Hanoi, Jakarta
- Save
You can now proceed with the player installation steps!
Installation
- Make sure your player connect to the Internet first
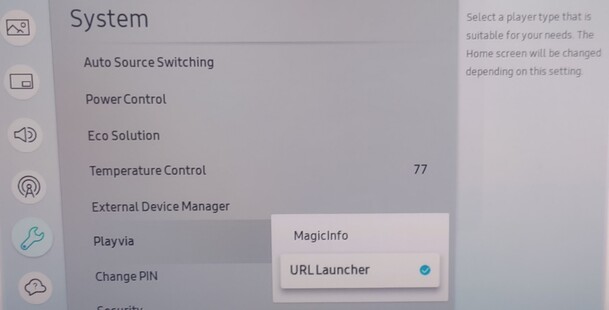
- Click Menu Button on your remote and go to System
- Close the settings and click Home Button on your remote
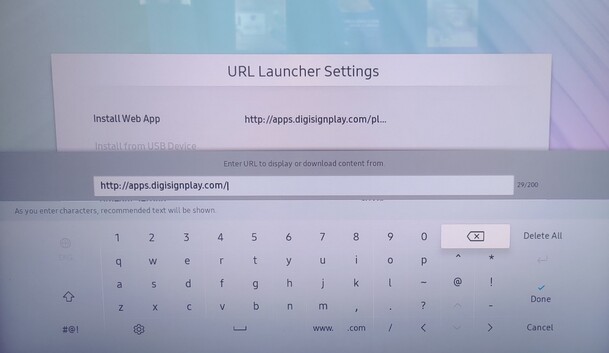
- Configure URL Launcher
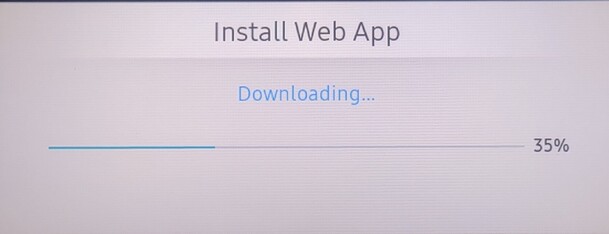
- Go to Install Web App and input http://apps.digisignplay.com without slash '/'
- Click Done to confirm and back to URL Launcher
- digisignPlay for Tizen is downloading
- After completed, your player will be restart and continue to connect to your CMS.
Change play via from MagicInfo to URL Launcher

Connect to your CMS
- Manual Configuration (CMS Address and Key)
Manual Configuration
Complete the required fields in the Player below;
- CMS Address: This is the fully qualified address of your CMS installation. For example http://apps.digisignplay.com
- CMS Key: The secret CMS Key that will authenticate this Display with the CMS.
- Connect.
- You'll be redirect to Licence Code. You'll have Licence Code after buy subscription plan.
Ask your Administration for the Key.

Didn't receive Licence Code after buy plan? Ask your Administrator for registering display.
Your Administrator will register your display and connect to your personal account.
Launch digisignPlay Player
Enjoy with digisignPlay running on Tizen Display!
webOS 6.0
- 32SM5J
- 50/55/65/75/86UL3J
- 43/49/55/65/75/86/98UH5J
- 43/49/55/65/75/86/98UH7J
webOS 4.1
- 43/50/55/65/75/86UL3G
- 43/49/55/65UM3(D)F
- 43/49/55/65UM3DG
- 43/49/55/65UH5F
- 43/49/55/65UH7F
- 22SM3G
- 55VSH7J
- XS4G
- XS4J
webOS 4.0
- 55EF5G
- 55EF5K
- 55EJ5G
- 55EJ5K
- 55EW5G
- 55EW5PG
- 55EW5TF-A/AB
- 55EW5TK
- 43/49/55SH7E
- 32/43/49/55SM5KE
- 49/55/65/75/86/98UH5E
- 75/86/98UM3E
- 88BH7F
- 86UH5PE
- 55XE4F
- 55EW5TF
- 55SVH7PF
- 55SVH7F
- 49/55VH7E
- 49/55VM5E
- LAA015F
- LAEC015
- WP400/WP401/WP402
webOS 3.2 (3.0+)
- 55EF5E
- 55EG5CD
- 55EG5CE
- 55EJ5D
- 55EJ5E
- 55EJ5E
- 32/43/49/55/65SM5D
- 32/43/49/55/65SM5KD
- 32/43/49/55TA3E
- 32/43/49/55SM5KE
- 86TR3D
- 86TR3E
- 55/65/75TC3D
- 55SVH7E
- 49VL5D
- 55VX1D
- WP320
webOS 3.0
- 65EE5PC
- 55EF5C, 55EV5C
- 55EH5C
- 55EJ5C
- 65EV5C
- 42/49/55LS73C
- 42/49/55LS75C
- 42/49/55LS73D
- 43/49/55SM3C
- 32/43/49/55/65SM5C
- 32/43/49/55/65SM5KC
- 55TC3CD
- 49/55/65UH5C
- 55XE3C
- 49XEB3E
- 75XF3C
- 49/55XF3D
- 55XF3E
- 75XF3ES
- 75XS2C
- 49/55XS2D
- 49/55XS2E
- 49/55XS4FB
webOS Box
The following are standalone set-top box style devices. As such, control of panel settings (screen on and off, colour, contrast, brightness, button lock etc) is not possible with these devices.
- WP320
- WP400
Prepare Your Monitor
It is essential that the correct Time and Date + Timezone are set on your monitor prior to player installation!
- Use the Settings button (cogwheel icon) on the remote control to access the General Menu.
- Select Time and Date.
- Use the drop down to select the correct Time and Date or alternatively Set Automatically.


Next, click on Time Zone:

You can now proceed with the player installation steps!
Install the digisignPlay for webOS IPK
To install digisignPlay for webOS, you will need to access the Server or SI Server Settings, depending on the webOS version running on your monitor.
Please follow the appropriate instructions from the options below for the webOS version you are using.
Access Server Settings on webOS 3.0:
- From the remote control, press and hold the Settings button until a toast message appears in the upper right corner to notify that your input has been received.
- Enter 8080, and press the OK button to open the Settings Menu:

Access SI Server Settings on webOS 3.2 and later:
- On your remote control, press the Settings button.
- Choose the EZ Setting option.
- Select the SI Server Setting option.
- Then choose SI Server Setting again on the next page:

Installing the Player
From here, there are two methods for installing the player:
- Using Remote URL
- Using a USB flash drive
1. Remote Installation
To remotely install the latest version of Xibo for webOS, set the fields on the Settings menu to the values provided below.
If you would prefer to auto-fill the settings, please follow Option 2: Auto-fill the Settings with USB-flash drive instructions.
Option 1: Manually enter the settings:
- Application Launch Mode - Local
- Fully Qualified Domain Name - On
- Application Type - IPK
- Local Application Upgrade - REMOTE
Enter the URL to your app package - https://digisignplay.com/api/downloads/4/latest
Selecting this option will initiate the download of digisignPlay for webOS Player to your monitor. This should be the last field you complete.
Option 2: Auto-fill the Settings with USB-flash drive:
If you would rather configure these settings in a text file instead, then you can do so and install those on the monitor via USB flash drive with the following JSON file content:
{
   "serverIp":"0.0.0.0",
   "serverPort":80,
   "secureConnection":false,
   "appLaunchMode":"local",
   "fqdnMode":true,
   "fqdnAddr":"https://digisignplay.com/api/downloads/4/latest",
   "appType":"ipk"
}
- Save the file as scap_installation.json.
- Copy the JSON file into the root directory of a USB flash drive.
- Insert the USB flash drive into the USB port of your monitor.
- Turn on your monitor. The Server Settings defined in the scap_installation.json file will have been loaded onto the monitor automatically.
When the installation is complete, please restart your monitor.
2. USB Installation
If you have a specific version of Xibo for webOS that you wish to install, or you do not have access to the internet to use the remote URL installation method, you can install the player locally via USB:
- Download the .ipk file for the player version you want to use from here
- Rename the downloaded ipk, for example, Digisign Play_for_webOS_v2_R204.ipk to com.lg.app.signage.ipk and save it in the path specified below on your USB flash drive.
- Insert the USB flash drive into the USB port on your monitor.
- Now access the Server Settings menu, as described earlier in this guide.
- On the Settings menu, set the fields with the values provided below.

If this path does not exist on your USB flash drive, please create it: [USB_root]/application/com.lg.app.signage.ipk

Application Launch Mode - Local Application Type - IPK Local Application Upgrade - USB
Setting Local Application Upgrade to USB will start the copying of the digisignPlay for webOS Player to your monitor. This should be the last field you complete.

When the installation is complete, please restart your monitor to complete the installation.


Connect to your CMS
After installing the player and restarting your monitor, the Connect to CMS screen will appear.
Enter the following:
- CMS URL: The fully qualified address of your CMS installation. Input http://apps.digisignplay.com
- CMS Key: The secret CMS Key that will authenticate this Display with the CMS.
NOTE : Ask your Administrator for CMS Key!

Once you have successfully entered the credentials for your CMS using one of the above methods, you should see the message: Display is registered and awaiting authorisation from an administrator in the CMS.
digisignPlay
DOCUMENTATION
hello! ~ $
Installation
And how to install Tizen & webOS player? Please read full article on digisignPlay documentary
Learn More