Preparation
digisignPlay is a flexible and powerful application with a core ethos in Digital Signage for all, regardless of skill level or technological knowledge.
The software itself centres on 5 core concepts:
- Users
- Display
- Layouts
- Media
- Scheduling
Using these 5 concepts we can sum up what digisignPlay can do in a simple sentence;
"digisignPlay enables a User to upload Media and arrange it in a Layout which is then Scheduled to one or more authorised Displays".
digisignPlay has many more features to take advantage of which are covered within this User Manual, but to get started let’s take a quick look at the main 5.
Users
Users are the people that are granted access to the CMS and are identified by a Username and Password to securely log in. digisignPlay supports 3 User Types, User Groups as well as multi-level Feature and Sharing access to all parts and items stored within the CMS.
Display
Displays represent the hardware connected to the TV/Projector/Tablet that is displaying the Scheduled end content. Each Display is uniquely identified in the CMS so that every Display can have its own content, Layout designs and Schedules set with uniquely identified reporting statistics available.
Layouts
Layouts are the complete design that is seen on the screen. Layouts are made up of Regions which allows you to split the screen/position how you choose, with each Region containing its own Playlist/Timeline to which Media Widgets are assigned. A Layout will remain on screen until all Regions have finished playing their assigned content through once, then an entirely fresh Scheduled Layout can be loaded that has different positioning/sizing of Regions and different Playlists/Timelines.
Media
Media content is at the core of the digisignPlay solution and has many different types which can be generally split into two categories:
- File-based media - uploaded and stored in the Library, for example, image and video files
- Layout based media - does not have an associated file and is configured directly on a Layout; RSS feeds and free Text
digisignPlay uses powerful Widgets which allow you to show your content as well as integrating dynamic third-party information from a variety of sources.
Scheduling
Scheduling is highly flexible and supports Schedules to single Displays as well as to Display Groups. Each Display will check for new Scheduled content periodically, and download Scheduled Items in advance of playback. Default Layouts are shown on Displays when nothing else is Scheduled.
SUPPORT
If you would like further help with the information contained in the User Manual please take a look at the Troubleshooting section or our digisignPlay Forum.
Customers on a Business or Enterprise plan have access to our experts on our Help Desk. Please open a ticket via My Account if you need assistance.
digisignPlay Apps
digisignPlay - Basic
digisignPlay - Display Management
digisignPlay - Touchscreen Content
digisignPlay for Windows
The digisignPlay Windows Player is distributed as a windows installer file (MSI) which is a standard “double click” installation.
There are 4 steps to follow:
- Preparation - Minimum Requirements and MSI
- Installation - Double-click the MSI to start the installation process.
- Connect - Connect your Player to the CMS.
- Authorise - Authorise your Display with the CMS.
Preparation - Minimum Requirements
digisignPlay does not require many resources to run, however with the advance of technology it has been necessary to set out some minimum requirements. The installation process will check these for you, but they are listed below for convenience:
- A network connection to the CMS (possibly over the Internet)
- Microsoft Windows 10 or later (see note below)
- Please note that starting with Windows 10 it is advisable to use the “professional” variant of the operating system. The “home” version no longer has the ability to fully control the schedule of automatic updates which may cause messages to interrupt your signage playback.
- .NET Framework v4.7.3
- Visual C++ Redistributable for Visual Studio 2015-2019 x86 (will be downloaded if not present)
- Internet Explorer 8+ ( recommended IE11 or higher )
- Flash Player Version 9 or later (if Flash support required)
- Windows Media Player 11 or later
- For PowerPoint support; Microsoft PowerPoint 2003 or later. PowerPoint viewer is not suitable.
- For edge browser tags and HLS support the Webview2 runtime is required. Download here
We recommend Windows 10 build 1909 or later. Enterprise LTSB is known to have issues with video playback.
Installation
- Download digisignPlay for Windows and double click on the digisignPlay.msi file.
- The installer presents a Welcome screen, click Next:
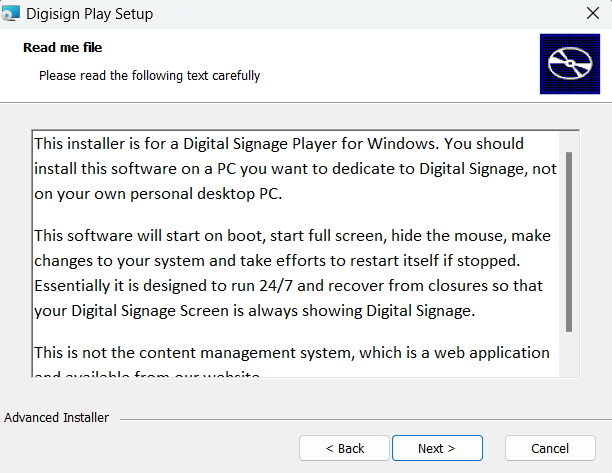
- Read the Read me file and click Next:
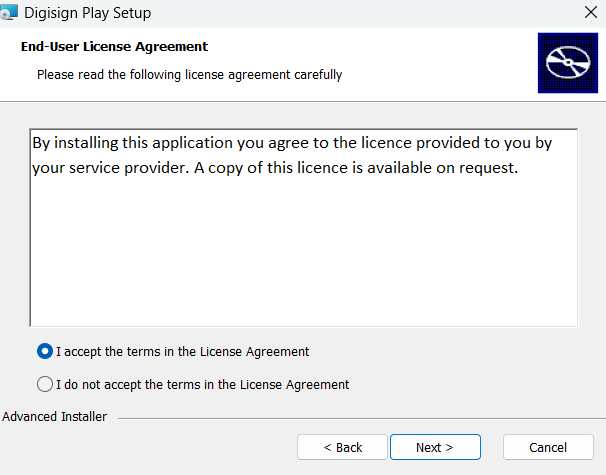
- Read the End-User License Agreement and click to accept these terms, click Next
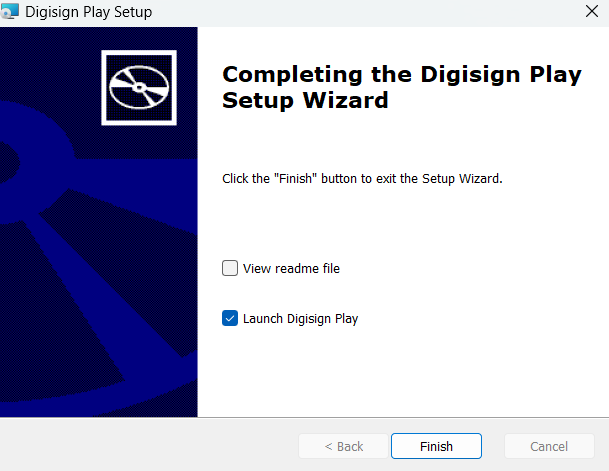
- The Installation is now complete, click Finish to exit the Setup Wizard:
The installer will take you through a number of screens, which are outlined below.
Please note: You may see a security warning or a message asking if you allow an app from an unknown publisher to make changes, during the installation stage. Please accept by clicking on “Run” or “Yes” to continue with the installation.

Click Install or click Back to review:
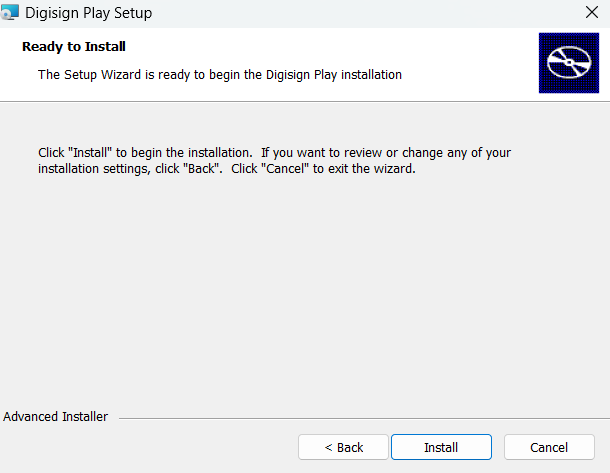
The Setup Wizard will start to install the digisignPlay Player, which may take several minutes.
Connect to your CMS
Newly installed Players must be configured and registered with the digisignPlay CMS before they can be used using Player Options.
The Player Options window is accessed from the Player using the Start Menu and selecting All programs.
Most of the Player options are set on the CMS and delivered over the network to the Player. This keeps the Player configuration to a minimum on each new installation.
Before any options can be sent from the CMS it is necessary to register the Display with the CMS instance by either:
- Manual Configuration (CMS Address and Key)
Manual Configuration
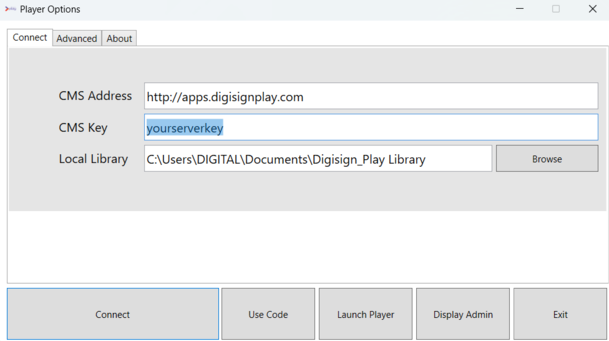
Complete the required fields in the Player Options window, from the Connect tab:
- CMS Address: This is the fully qualified address of your CMS installation. For example http://apps.digisignplay.com
- CMS Key: The secret CMS Key that will authenticate this Display with the CMS.
- Connect and wait your Administrator to approve your Display.
- Launch Player.
Ask your Administrator for the Key.
Your Administrator will register your display and connect to your personal account.
Display Setting Profiles
Once registered, the Player will be given a default Display Setting Profile.
Launch digisignPlay Player
You can now select "Launch Player" from the Player Options window or go to all programs and click on digisignPlay Player. It should display the digisignPlay Splash Screen while the Default Layout and its media contents (and anything else you have Scheduled) are downloaded.
The Player will then begin playing Layout contents.
digisignPlay for Android
The digisignPlay Android Player released as an APK file which can be opened and installed by the Android OS.
There are 4 steps to follow:
- Preparation - Minimum Requirements and APK
- Installation - Click APK to start the installation process.
- Connect - Connect your Player to the CMS.
- Authorise - Authorise your Display with the CMS.
Preparation - Minimum Requirements
digisignPlay does not require many resources to run, however with the advance of technology it has been necessary to set out some minimum requirements. The installation process will check these for you, but they are listed below for convenience:
- A network connection to the CMS (possibly over the Internet)
- Android 4.4
- Please note: As a minimum, Android 4.4 is required to run digisignPlay for Android 1.7, 1.8 and 3.0, but we strongly recommend running on Android 7.1 or later regardless of version.
- SDK 19 minimum
- SDK 25 is recommended
- Support Video Encoder
We recommend Android 7.1 or above.
Installation
- Download digisignPlay for Android and click on the digisignPlay.apk file.
- Waiting for install progress.
- Done.
Please note: You may see a security warning or a message asking if you allow an app from an unknown sources to make changes, during the installation stage. Please accept by clicking on “Run” or “Yes” to continue with the installation.
Connect to your CMS
- Manual Configuration (CMS Address and Key)
Manual Configuration
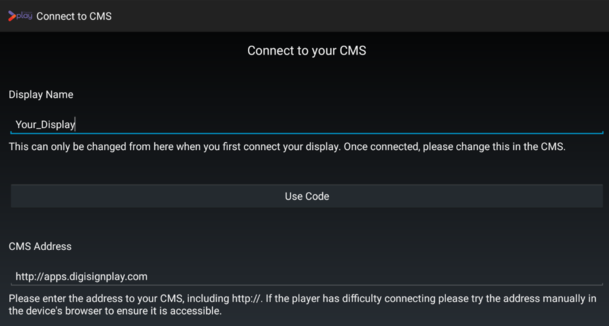
Complete the required fields in the Player Options window, from the Connect tab:
- CMS Address: This is the fully qualified address of your CMS installation. For example http://apps.digisignplay.com
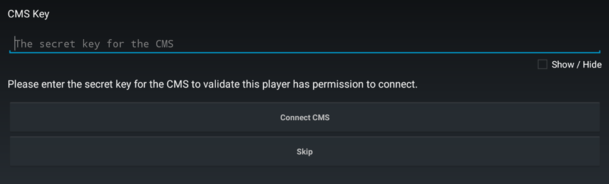
- CMS Key: The secret CMS Key that will authenticate this Display with the CMS.
- Connect.
- You'll be redirect to Licence Code. You'll have Licence Code after buy subscription plan.
Ask your Administration for the Key.

Didn't receive Licence Code after buy plan? Ask your Administrator for registering display.
Your Administrator will register your display and connect to your personal account.
Launch digisignPlay Player
Enjoy with digisignPlay running on Android Display!
digisignPlay for Tizen
digisignPlay Tizen Player easy to install and configure and can be up and running in just a few minutes. Before you begin the installation process, you should first make sure you have fulfilled the minimum requirements below;
REQUIREMENT SAMSUNG TYPE. Note: All listed monitors with a ✓ symbol have been officially tested. Any models without this symbol are expected to work as they contain the same chipset as the listed models.
SSSP5
- 43/49 DBJ
- 49/55/65 QMH ✓
- 55/65 QHH
- 65/75 QBH
SSSP6
- 13/24/43/49/50/55/65/75/85/98 QBR ✓
- 32/43/49/50/55/65/75/85 QMR ✓
- 37 SHR - Please note that this model supports landscape orientation only.
- 43/49/55/65/75 QBN ✓
- 43/49/50/55/65/75 QHR ✓
- 43/49/55/65/75/85/98 QMN ✓
- 46 VMR-U
- 46/55 OMN/OMN-D ✓
- 55 OHA
- 82 QEN
- 85 OHN/OHN-D/OHN-S
- 98 QBT
- 98 QMT
Signage Player Box
- SBB- SS08NL1
- 13/24 QBR-T
- 55/65 QHH
- 65/75 QBH
INTERACTIVE DISPLAY: Please note that interactive actions are supported in digisignPlay for Tizen version 300 and newer.
SSSP5
- 43/49 DBJ
- 49/55/65 QMH ✓
- 32/43/55 QMR-T
SSSP7
- 55 OHA-S
- 75 OMR
- 75 OMA ✓
- 82 QER ✓
- 82/98 QPR ✓
- 46 OHB
- 46/55 OMB
- 55 OMN-S
SSSP10 - Newest Version
- 43/50/55/65/75 QBB
- 43/50/55/65/75 QHB
- 43/50/55/65/75 QMB ✓
- 24/46 OHB
Prepare Your Monitor
It is essential that the correct Time and Date + Timezone are set on your monitor prior to player installation!
- Use the Menu button on your remote control to access the System Menu.
- Select Time
- You can choose to manually set the time using the Clock Set option or you can go to NTP Settings to configure an NTP Server for automatic time settings. Please note that you will find the time zone settings in the NTP Settings menu.
- Turn on NTP Time
- Input http://apps.digisignplay.com and set time to Bangkok, Hanoi, Jakarta
- Save
You can now proceed with the player installation steps!
Installation
- Make sure your player connect to the Internet first
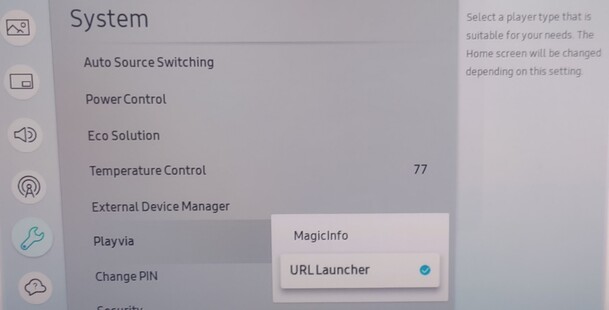
- Click Menu Button on your remote and go to System
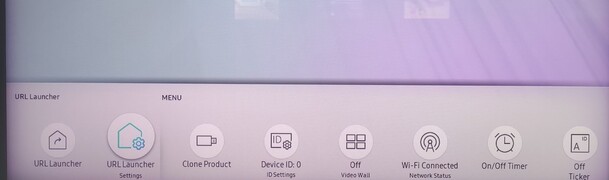
- Close the settings and click Home Button on your remote
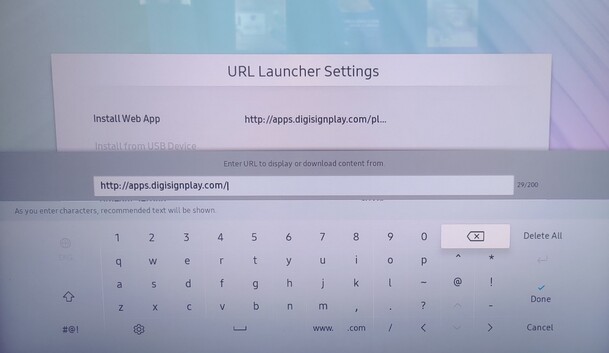
- Configure URL Launcher
- Go to Install Web App and input http://apps.digisignplay.com without slash '/'
- Click Done to confirm and back to URL Launcher
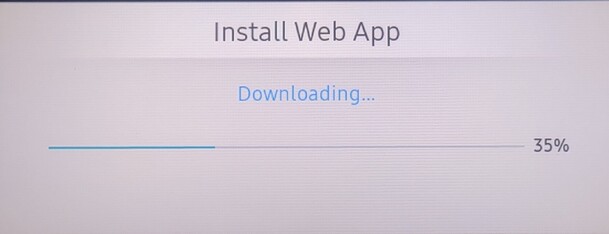
- digisignPlay for Tizen is downloading
- After completed, your player will be restart and continue to connect to your CMS.
Change play via from MagicInfo to URL Launcher
Connect to your CMS
- Manual Configuration (CMS Address and Key)
Manual Configuration
Complete the required fields in the Player below;
- CMS Address: This is the fully qualified address of your CMS installation. For example http://apps.digisignplay.com
- CMS Key: The secret CMS Key that will authenticate this Display with the CMS.
- Connect.
- You'll be redirect to Licence Code. You'll have Licence Code after buy subscription plan.
Ask your Administration for the Key.

Didn't receive Licence Code after buy plan? Ask your Administrator for registering display.
Your Administrator will register your display and connect to your personal account.
Launch digisignPlay Player
Enjoy with digisignPlay running on Tizen Display!
digisignPlay for webOS
digisignPlay for webOS is easy to install and configure and can be up and running in just a few minutes. Before begin the installation process, you should first make sure you have fulfilled the minimum requirements below;
webOS 6.0
- 32SM5J
- 50/55/65/75/86UL3J
- 43/49/55/65/75/86/98UH5J
- 43/49/55/65/75/86/98UH7J
webOS 4.1
- 43/50/55/65/75/86UL3G
- 43/49/55/65UM3(D)F
- 43/49/55/65UM3DG
- 43/49/55/65UH5F
- 43/49/55/65UH7F
- 22SM3G
- 55VSH7J
- XS4G
- XS4J
webOS 4.0
- 55EF5G
- 55EF5K
- 55EJ5G
- 55EJ5K
- 55EW5G
- 55EW5PG
- 55EW5TF-A/AB
- 55EW5TK
- 43/49/55SH7E
- 32/43/49/55SM5KE
- 49/55/65/75/86/98UH5E
- 75/86/98UM3E
- 88BH7F
- 86UH5PE
- 55XE4F
- 55EW5TF
- 55SVH7PF
- 55SVH7F
- 49/55VH7E
- 49/55VM5E
- LAA015F
- LAEC015
- WP400/WP401/WP402
webOS 3.2 (3.0+)
- 55EF5E
- 55EG5CD
- 55EG5CE
- 55EJ5D
- 55EJ5E
- 55EJ5E
- 32/43/49/55/65SM5D
- 32/43/49/55/65SM5KD
- 32/43/49/55TA3E
- 32/43/49/55SM5KE
- 86TR3D
- 86TR3E
- 55/65/75TC3D
- 55SVH7E
- 49VL5D
- 55VX1D
- WP320
webOS 3.0
- 65EE5PC
- 55EF5C, 55EV5C
- 55EH5C
- 55EJ5C
- 65EV5C
- 42/49/55LS73C
- 42/49/55LS75C
- 42/49/55LS73D
- 43/49/55SM3C
- 32/43/49/55/65SM5C
- 32/43/49/55/65SM5KC
- 55TC3CD
- 49/55/65UH5C
- 55XE3C
- 49XEB3E
- 75XF3C
- 49/55XF3D
- 55XF3E
- 75XF3ES
- 75XS2C
- 49/55XS2D
- 49/55XS2E
- 49/55XS4FB
webOS Box
The following are standalone set-top box style devices. As such, control of panel settings (screen on and off, colour, contrast, brightness, button lock etc) is not possible with these devices.
- WP320
- WP400
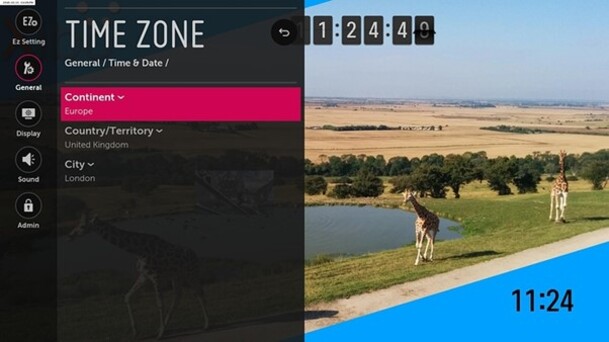
Prepare Your Monitor
It is essential that the correct Time and Date + Timezone are set on your monitor prior to player installation!
- Use the Settings button (cogwheel icon) on the remote control to access the General Menu.
- Select Time and Date.
- Use the drop down to select the correct Time and Date or alternatively Set Automatically.
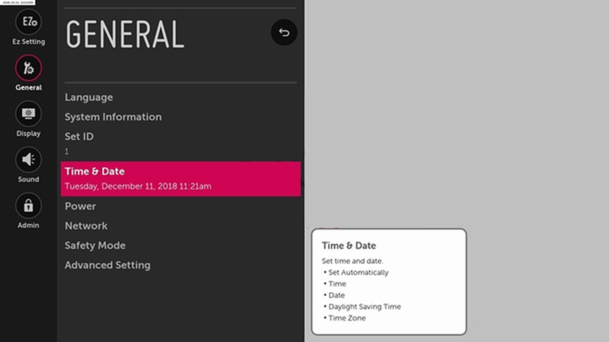

Next, click on Time Zone:
You can now proceed with the player installation steps!
Install the digisignPlay for webOS IPK
To install digisignPlay for webOS, you will need to access the Server or SI Server Settings, depending on the webOS version running on your monitor.
Please follow the appropriate instructions from the options below for the webOS version you are using.
Access Server Settings on webOS 3.0:
- From the remote control, press and hold the Settings button until a toast message appears in the upper right corner to notify that your input has been received.
- Enter 8080, and press the OK button to open the Settings Menu:

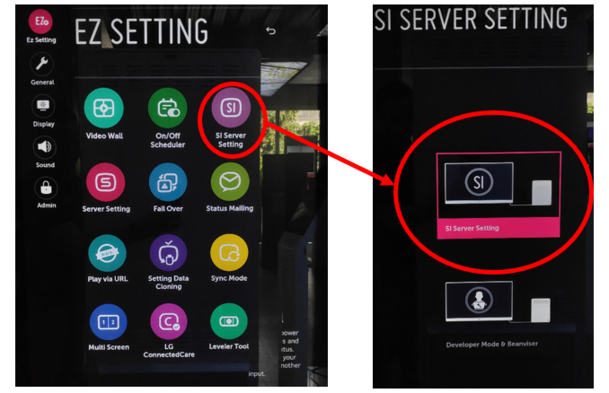
Access SI Server Settings on webOS 3.2 and later:
- On your remote control, press the Settings button.
- Choose the EZ Setting option.
- Select the SI Server Setting option.
- Then choose SI Server Setting again on the next page:
Installing the Player
From here, there are two methods for installing the player:
- Using Remote URL
- Using a USB flash drive
1. Remote Installation
To remotely install the latest version of Xibo for webOS, set the fields on the Settings menu to the values provided below.
If you would prefer to auto-fill the settings, please follow Option 2: Auto-fill the Settings with USB-flash drive instructions.
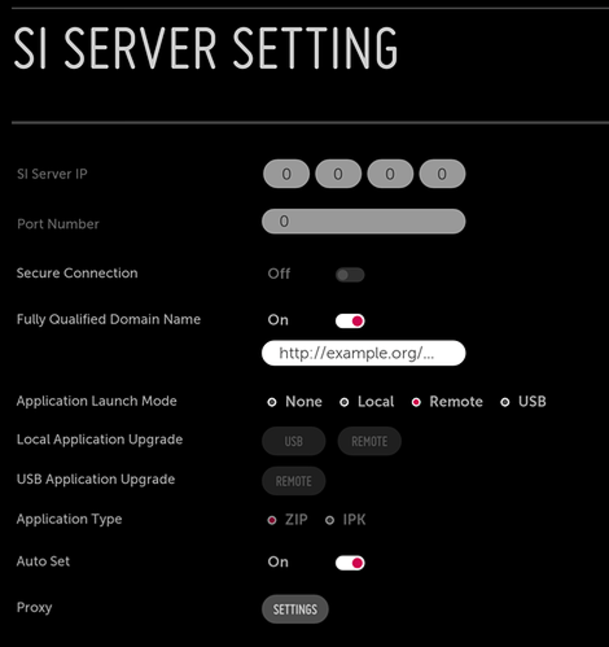
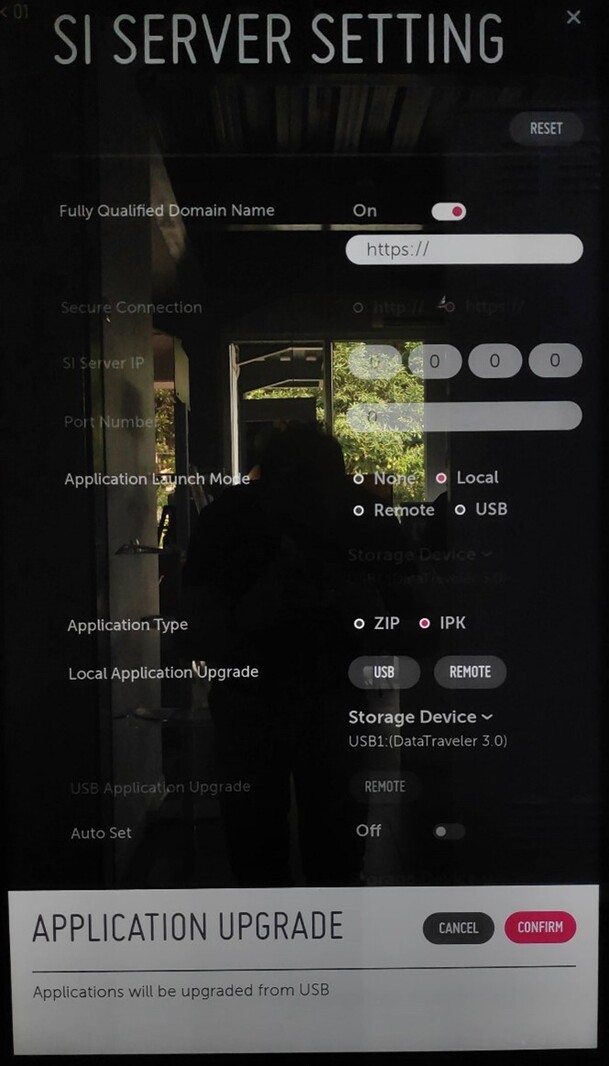
Option 1: Manually enter the settings:
- Application Launch Mode - Local
- Fully Qualified Domain Name - On
- Application Type - IPK
- Local Application Upgrade - REMOTE
Enter the URL to your app package - https://digisignplay.com/api/downloads/4/latest
Selecting this option will initiate the download of digisignPlay for webOS Player to your monitor. This should be the last field you complete.
Option 2: Auto-fill the Settings with USB-flash drive:
If you would rather configure these settings in a text file instead, then you can do so and install those on the monitor via USB flash drive with the following JSON file content:
                {
                      "serverIp":"0.0.0.0",
                      "serverPort":80,
                      "secureConnection":false,
                      "appLaunchMode":"local",
                      "fqdnMode":true,
                      "fqdnAddr":"https://digisignplay.com/api/downloads/4/latest",
                      "appType":"ipk"
                }
- Save the file as scap_installation.json.
- Copy the JSON file into the root directory of a USB flash drive.
- Insert the USB flash drive into the USB port of your monitor.
- Turn on your monitor. The Server Settings defined in the scap_installation.json file will have been loaded onto the monitor automatically.
When the installation is complete, please restart your monitor.
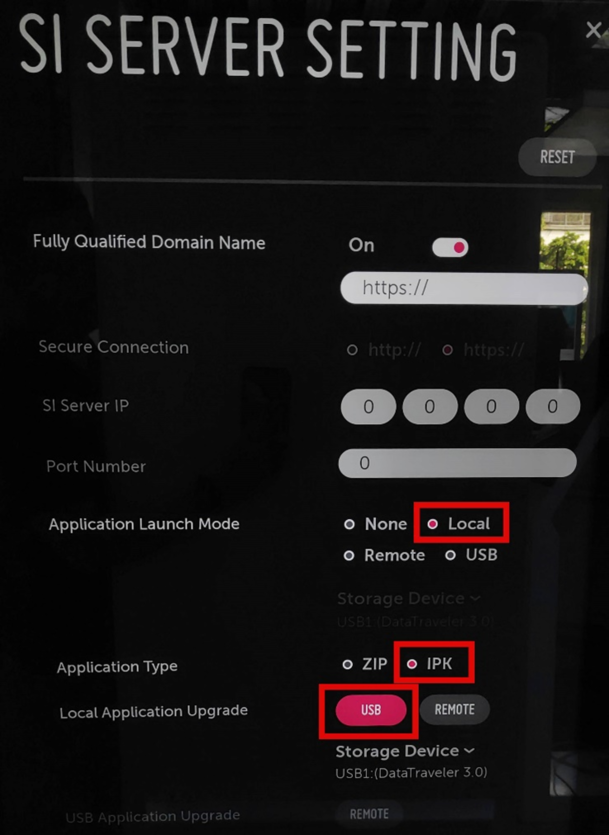
2. USB Installation
If you have a specific version of Xibo for webOS that you wish to install, or you do not have access to the internet to use the remote URL installation method, you can install the player locally via USB:
- Download the .ipk file for the player version you want to use from here
- Rename the downloaded ipk, for example, Digisign Play_for_webOS_v2_R204.ipk to com.lg.app.signage.ipk and save it in the path specified below on your USB flash drive.
- Insert the USB flash drive into the USB port on your monitor.
- Now access the Server Settings menu, as described earlier in this guide.
- On the Settings menu, set the fields with the values provided below.

If this path does not exist on your USB flash drive, please create it: [USB_root]/application/com.lg.app.signage.ipk
Application Launch Mode - Local Application Type - IPK Local Application Upgrade - USB
Setting Local Application Upgrade to USB will start the copying of the digisignPlay for webOS Player to your monitor. This should be the last field you complete.
When the installation is complete, please restart your monitor to complete the installation.
Connect to your CMS
After installing the player and restarting your monitor, the Connect to CMS screen will appear.
Enter the following:
- CMS URL: The fully qualified address of your CMS installation. Input http://apps.digisignplay.com
- CMS Key: The secret CMS Key that will authenticate this Display with the CMS.
NOTE : Ask your Administrator for CMS Key!

Once you have successfully entered the credentials for your CMS using one of the above methods, you should see the message: Display is registered and awaiting authorisation from an administrator in the CMS.
Finalization
digisignPlay helps improve businesses worldwide and across all industries with our digital signage solution. Digital Signage helps businesses reduce spend on traditional printing costs and reach a wider audience
Engage and inform employees and visitors quickly and efficiently across multiple locations. customers and passers-by with beautiful and engaging digital displays
Keep Your Password Secure
Safe and secure passwords are simple to create with a quality password manager. Don’t stress about coming up with passwords for every account yourself.
Creating a strong and secure password can reduce the risk of cybercriminals guessing your password and accessing sensitive data. Compromised passwords caused 80% of all data breaches in 2019, resulting in financial losses for both businesses and consumers. Fear of forgetting complex passwords, especially when there are several to remember, is a common worry that people have while creating them. A strong password makes the amount of time it takes to guess it exponentially longer to where if you use a 20 character randomized password with upper/lowercase letters, numbers, symbols. It would take a computer 3 sextillion years to crack it. There are many different types of attacks that cybercriminals use that target simple passwords. For businesses, cybercriminals can start disinformation campaigns against companies, sharing their data with competitors and storing it for a ransom.
digisignPlay is not responsible if you have a weak password and your account is successfully hacked by others. digisignPlay encrypts your data end-to-end so that we cannot know the identity of your password.
IMPORTANT!
Every time you configure your player, you must have a CMS Key and Licence Code. Licence Code is the premium version of digisignPlay (lifetime, not trial) and you will have a Licence Code if you have subscribed to digisignPlay.
If you are having trouble configuring your player, you can contact your Administrator.